- Note: The installation process may restart your PostgreSQL instance for complete configuration.

To add a new instance, navigate to the Instances page and click the “Add Instance” button (see the number 1 in the figure above).
Step 1: Select PostgreSQL

In the pop-up window select PostgreSQL and click the “Next” button to continue.
Step 2: Enter Field Values
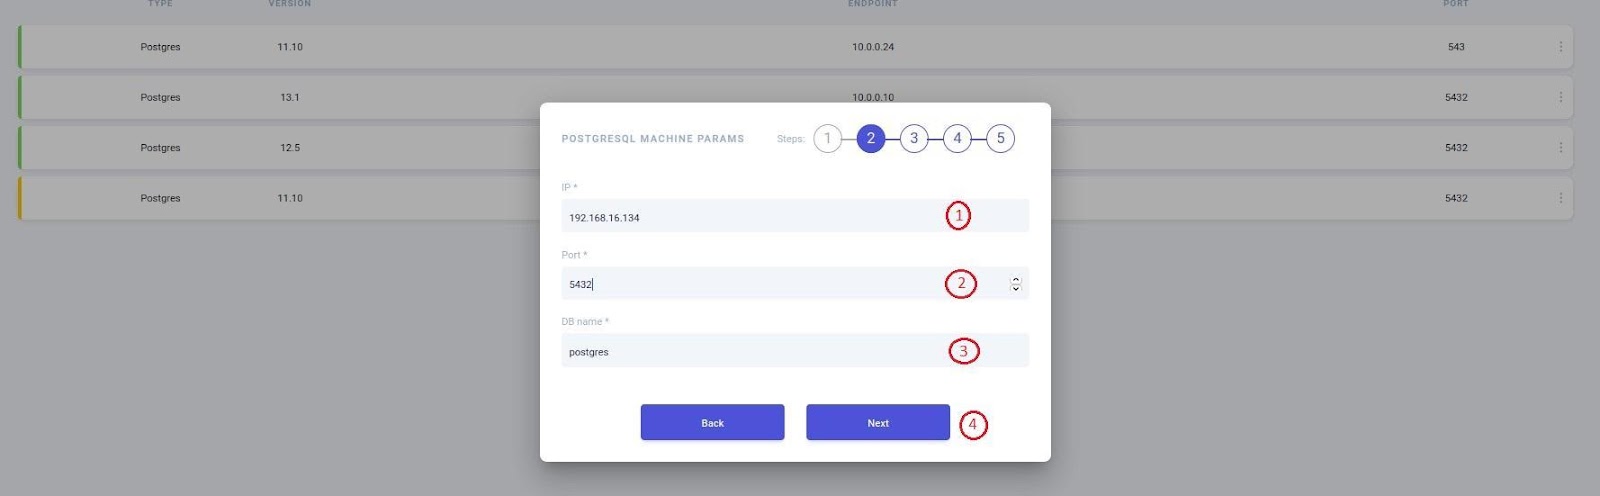
In the second step, fill in the given fields with the following values:
- The IP address at which the PostgreSQL is located
- The port on which the PostgreSQL listens (5432 is the default PostgreSQL port)
- One of valid database names; the default value is postgres – leave it as is if you didn’t delete it
Click the “Next” button to continue.
Step 3: Copy Command and Login

In this step, you must first select the type of OS (indicated by the number 1 in the figure above) and then its version (indicated by the number 2 in the figure above). After that, the installation commands will appear, copy them (indicated by the numbers 3-6) and log in as sudo to the PostgreSQL Server by pasting the copied command into the Command-Line Interface and running it in the terminal.


When the installation is finished, you will be asked to insert the Metadata. Copy this from the UI (indicated by the number 1 on the figure above) and paste it into the Command Line (indicated by the number 2), then press Enter.

After the installation has finished successfully, click the “Next” button on the UI page to continue.

To avoid future problems, you must refresh the status of the agent (indicated by the number 1 on the figure above) in case of errors during installation.
Step 4: Execute Copied UI Command
In the next step, a command is presented that will configure the instance. Copy this command from the UI and paste it to the CLI that is open from the previous step.


Paste the command and press Enter to execute the command. You will need to enter the following four parameters:

- First, enter “proceed” to continue.

- Next, define and type in the password for the Awide user to connect to PostgreSQL. Awide will connect that user to Postgres to collect metrics and perform all necessary management actions.

- Third, enter the superuser name – you will use this just one time to configure and restart the PostgreSQL Instance.

- Finally, enter the password of this superuser, which will be the password for the superuser entered in the previous step (Step 2).
- You only need the superuser once, for the complete configuration and restart of the server after the installation is finished. The superuser credentials will not be stored in any place.

After the Installation is finished on the CLI, click the “Next” button to continue to the next page (indicated by the number 2 in the figure above).
Step 5: Complete Installation

In this step, validate the installation and click the “Next” button when you are ready.
Now, take a break for five minutes, AWIDE will collect the information about your instance. The new instance will appear in the Instances list. Click the new instance to view your completed PostgreSQL installation.
Leave a Reply